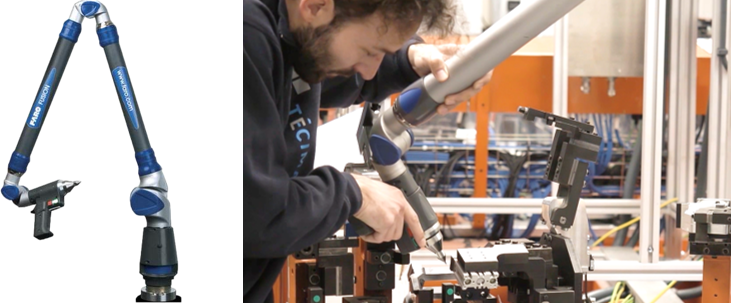
Articulated arms are tools of high precision measurement and verification used in different sectors for part inspection, CAD design, reverse engineering and quality control.
Calibration of this equipment is essential to ensure the accuracy and reliability of the measurements and verifications they perform.
Why is Calibration so important in articulated arms?
Main reasons to calibrate this equipment:
- Guarantees Measurement Accuracy
Over time and use, mechanical components may deviate slightly from their exact positions and affect measurement accuracy. Calibration ensures that the articulated arm is providing accurate and consistent measurements.
- Ensures Conformity with Standards
There are strict quality and precision standards that must be met in many industries, so regularly calibrating measuring arms ensures that measurements meet the required specifications and regulations, avoiding compliance issues.
- Provides Reliability to Data
For the data collected by articulated arms to be useful, it must be reliable. Periodic calibration ensures data is consistent and accurate, which is essential for analysis and decision making.
- Prevents errors
Lack of calibration can lead to measurement errors that are not easily detected. These errors can result in defective products, assembly problems, and other critical failures.
- Helps Maintain Performance
Regular calibration helps maintain optimal boom arm performance. It allows early detection of wear or damage to components, which facilitates preventive maintenance and prolongs the useful life of the equipment.
- Generates confidence in the Inspection Process
Operators and technicians can rely on measurement results, which is essential for quality inspection and process control in manufacturing.
- Improve Competitiveness and Reputation
The ability to provide high quality and precision products improves a company's competitiveness in the market. Regular calibration helps maintain a strong reputation for quality and reliability.
8 advantages of calibrated articulated arms
- High accuracy
They are very precise in measurement, allowing minimal variations in the dimensions of objects to be detected.
2. Mobility and Flexibility
They are portable and can be easily transported and used in different locations within a plant or job site. In addition, the flexibility of its joints allows access to hard-to-reach areas.
3. Ease of Use
The measuring arms have an ergonomic design that facilitates handling and intuitive and friendly interfaces and software that simplify measurement operations and data analysis.
4. Connectivity
Integration with metrology and CAD software enables real-time data collection and analysis. Some models have wireless connectivity.
5. 3D Scanning Technology
By equipping the measuring arms with 3D laser scanners, it is possible to capture complex shapes and surfaces in great detail.
6. Advanced Software
For data processing, dimensional analysis and report generation. They have the ability to integrate data with computer-aided design and manufacturing (CAD/CAM) programs.
7. Multifunctionality
The articulated arms are capable of performing multiple actions such as part inspection, geometry verification, comparison with CAD models...
8. Compatibility with Accessories
They can be equipped with various accessories and probes to adapt to different types of measurement and specific requirements.
Applications of articulated arms
Measuring arms are used in different industries to ensure the precision and quality of processes and products. Some applications:
- Automotive:
Inspection of components and assemblies, ensuring that parts meet precise specifications.
- Aerospace:
Verification of critical components and structures, ensuring safety and compliance with industry standards.
- Manufacture:
Quality control and precision assurance in the manufacturing of parts and components.
- Reverse Engineering:
Capturing data from existing objects to replicate or improve product design.
- Architecture and Construction:
Measurement and analysis of existing structures for renovation and construction projects.
Téciman and Calibration
Téciman is a Calibration Laboratory of Coordinate Measuring Machines accredited by ENAC (National Accreditation Entity) for any brand and model: DEA, Brown&Sharpe, Mitutoyo, Leitz, Trimek, Mora, Micro 3D, Stiefelmayer, Tesa, Zeiss, Coord3, Poly, Hexagon…
Calibration of articulated arms
In addition to three-dimensional machines, at Téciman we also carry out the calibration of portable measuring arms under ISO 10.360-12 standard.
We offer a calibration service fast and flexible. For any brand Faro, Romer, Hexagon, Kreon, Coord3/LK, API…
We have the ability to calibrate:
- Arms up to 1,600mm Diam
- Arms up to 3,300mm Diam
- Scanner
We calibrate articulated arms of the main brands on the market (Faro, Romer...), for example:
- Quantum Max FaroArm
- Gage Max FaroArm
- Super 6DoF TrackArm
- Romer Absolute Arm
Repair, Maintenance and Updating of measuring arms
We carry out the articulated arm repair Lighthouse.
For a better result, we give the option of software upgrade.
We offer Training tailored for operators.
For more information consult our website (www.teciman.com), call us at 947 20 91 41 or send an email to teciman@teciman.com. Follow us on LinkedIn to find out all the news.
